The Workflow
A chronological look at the Factory Floor - from starting idea to built release.
Step 1: The Input (Elaboration)
The Goal: Move smoothly from “vague idea” to “ratified specification”.
-
New Application: Paste a raw text brief or upload requirements documents. Klyve will do an assessment and guide you forward from there.
-
Existing Codebase: Point Klyve to a local directory to index your current architecture. Klyve’s Analysis Engine analyzes your code base and generates professional UX/UI, Application, Technical Specifications and DB Schema (if applicable) documents in .docx and .md formats.
Step 2: The Logic (Planning)
The Goal: Translate the “What” (Specs) into the “How” (Work Items).
Once specs are approved, Klyve generates a hierarchical Project Backlog. For maintenance projects, it marks existing items as complete. You just add the new changes. Before a sprint starts, two critical checks occur:
- Implementation Planning: Generates a step-by-step Logic Plan detailing exactly which functions will be created and the order of operations. Get expert input from AI reviewers for security, scalability and general best practices.
- Impact Analysis: For change requests, an analysis identifies which existing files will be touched, flagging potential regressions.
The Checkpoint: You read the plan. If the technicals look wrong, you reject it. Code is never written without a plan you have authorized.
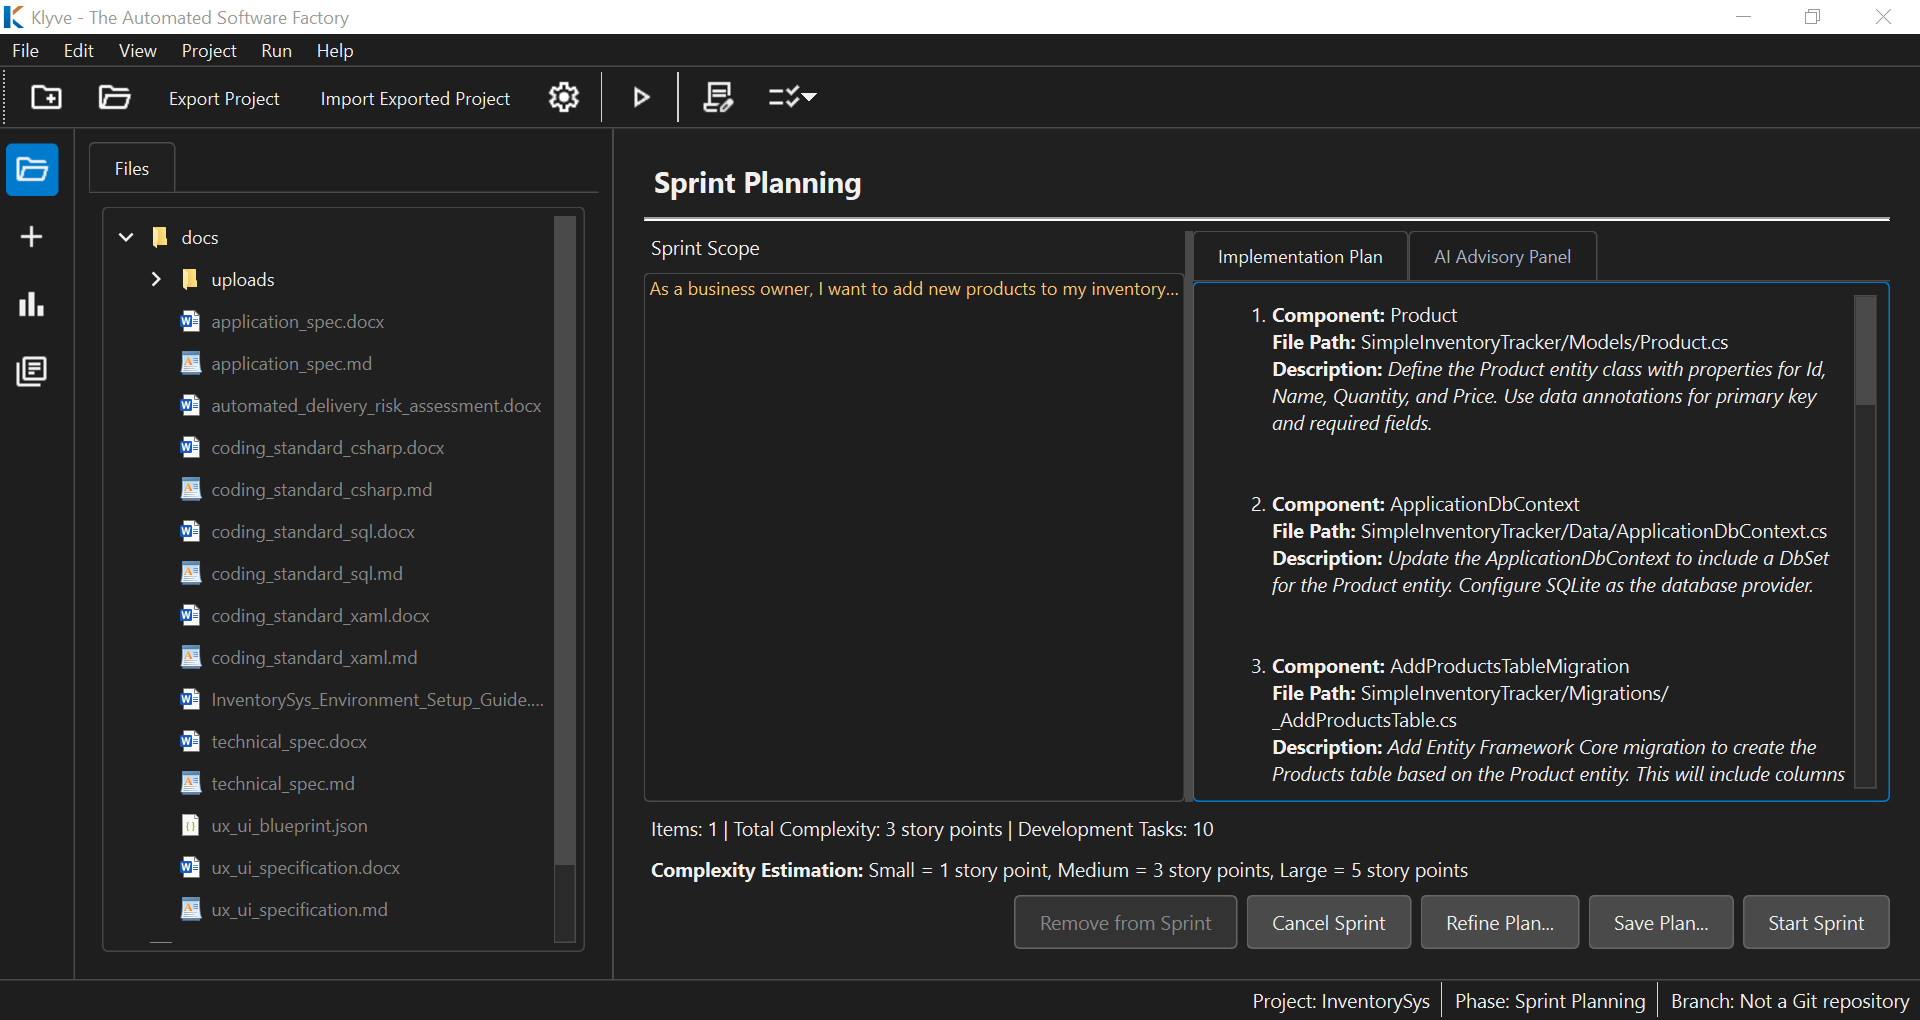 Above: Klyve generates a detailed implementation plan for your approval before writing code.
Step 3: The Execution (Implementation Pipeline)
The Goal: Automated, serialized production.
You click “Start Sprint.” The interface shifts to the Live Log View. Klyve iterates through the plan task-by-task:
- Logic Synthesis: Converts task requirements into pseudocode.
- Code Generation: Writes source code adhering to your Coding Standards.
- Auto-Review: Scans for syntax errors and style violations.
- Unit Testing: Generates and runs unit tests immediately.
- Commit: If tests pass, the code is committed to your local Git repository.
Handling Errors: If self-correction fails, you can “Pause for Manual Fix,” launching your local IDE to resolve the issue before resuming the pipeline.
Step 4: The Delivery (Review & Release)
The Goal: A clean handoff of working software.
When sprint development tasks are complete, Klyve runs the Full Regression Test Suite followed by a Sprint Integration Test Suite.
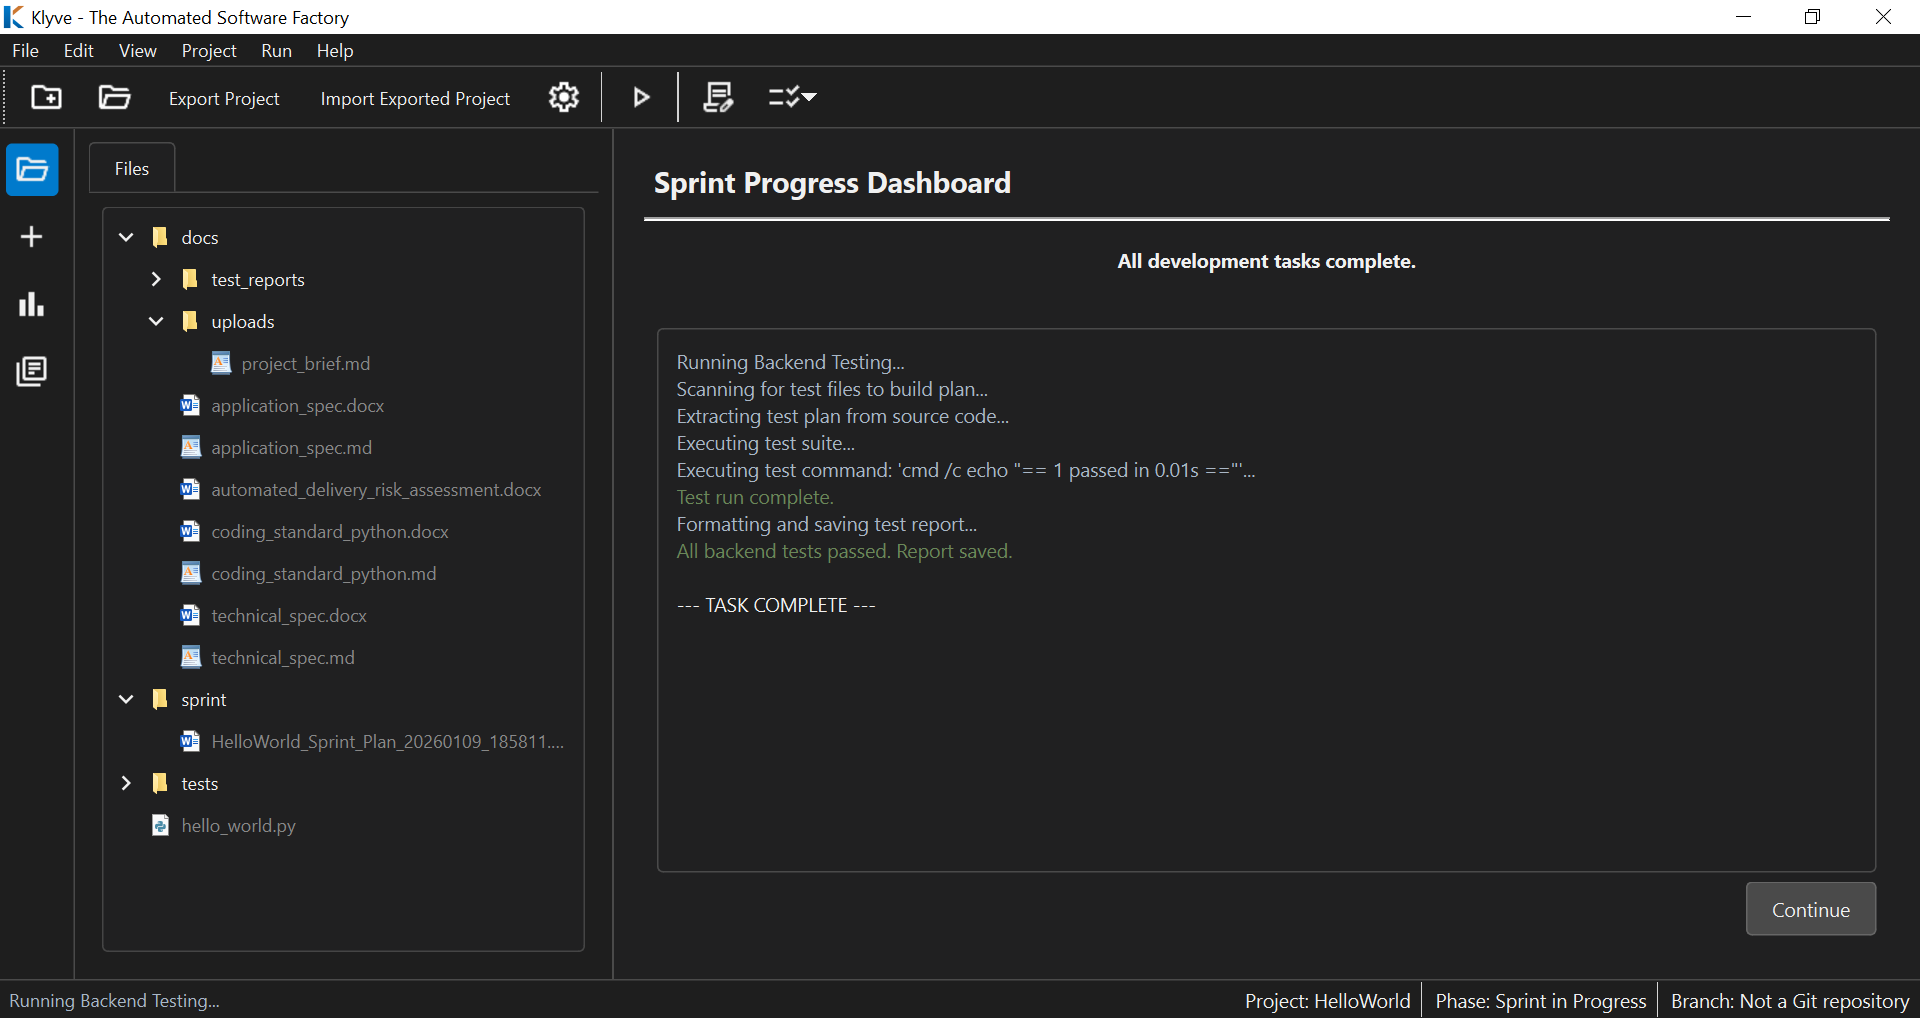 Above: Automated regression testing ensures new features don’t break existing logic.
Upon success, you receive:
- The Code: Committed, merged, and ready for deployment.
- The Reports: Full Backlog Traceability and detailed Test Execution reports.
- The Documentation: Your Specifications are automatically updated to reflect the changes made during the sprint.